
FAQ for Teachers Providing Courses in OLAT
Login to OLAT
If you have a HRZ account:
- Check that you are on the correct login page. It should say HRZ-Account in the login field. If not, click the link Do you use a HRZ account? to switch to the correct page.
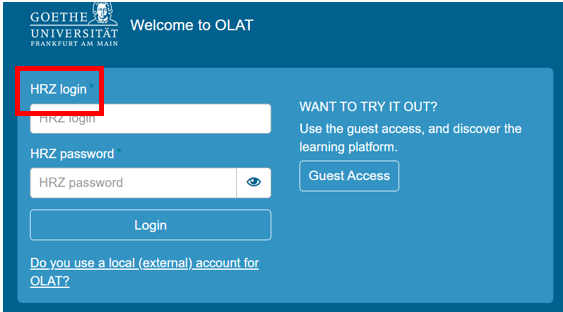
- Check whether you are using the correct password. Try login to other HRZ services, e.g. webmail (https://webmail.server.uni-frankfurt.de). If this also fails, please come to the Goethe-Card Service to request a new password.
- Check whether you mistyped your username. Your HRZ username contains only lower-case letters, e.g. s1234567 or janedoe.
- Prevent your web browser from saving your login credentials. If you mistype your password and/or your username and save them, your browser will always fill in the wrong credentials. Consult your browser's manual on how to delete saved usernames and passwords.
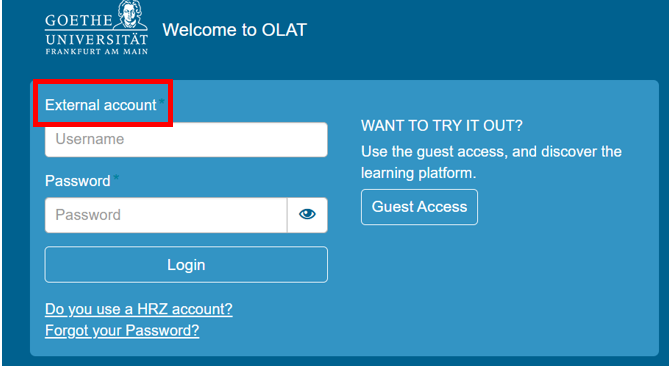
If you have a local/external account instead of a HRZ account:
- Check whether you are using the correct login screen.
- If not, click Do you use a local (external) account for OLAT? on https://olat-ce.server.uni-frankfurt.de to switch login screens. Trying to log in with a local account on the HRZ account login screen will result in an error message.
Creating Courses
Learning resources are independent entities whose content can be used inside courses to extend their functionality.
They can be created when a responding course element is added to a course or independently of a course directly in the tab Teach & Learn:
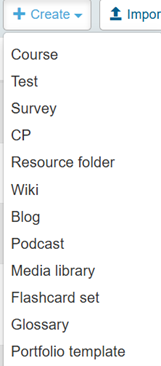
Contrary to e.g. a folder that is bound to a specific course, learning resources only get linked inside OLAT courses, but exist independently of them. Since a learning resource is only linked, it can be used in multiple courses, but is edited only once. A learning resource can have multiple owners and can thus also be edited and shared among them.
You can find your own resources in the tab Teach & Learn as My Resources in the menu.
To create learning resources, you need author privileges in OLAT.
Under the tab Teach & Learn you will find three Create Course options.
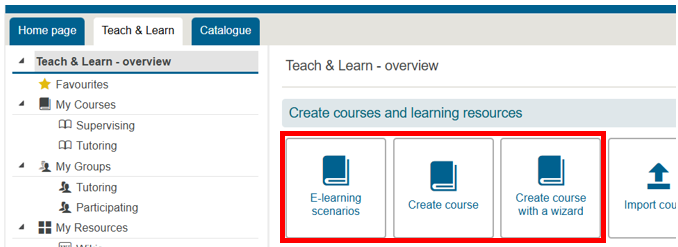
Regardless of which option you choose to create your course, it is always possible to modify and adapt the course you have created.
For beginners we
recommend the option Create course with a wizard.
Please click the button Create course with a wizard. You will then be guided through the course
creation process.
Take your time with creating your course and take care not to underestimate the time you will have to put in to create good and useful learning resources!
You can copy a course to use it as a template for new courses. This way, you will not have to do the same work all over again every semester.

In More settings choose the copy option.
Copying a course will give you a new course with an
identical structure and all elements and files and learning groups, but without
the participants and their uploaded documents, forum postings or tests results.
Please note that the names of learning groups will not
be changed by copying the course. For example, if your course contains a
learning group called “Course group winter term 2025/26" and you intend to
copy this course, you will have to rename the learning group to e.g. “Course
group summer term 2026".
If you want to give your learning group a new name in the course, please use the group management function:

You must then decide whether the existing filters in the course should be adjusted automatically or whether you want to do this manually yourself. You will then need to publish the course again.
Your tab Teach & Learn shows your courses (choose My Courses in the menu).
If you have added the portlet Favourites to your home page, mark the desired courses and learning resources with the star and they will appear on your OLAT home page.
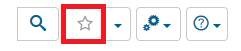
To add the portlet Favourites on your OLAT home page click this button:
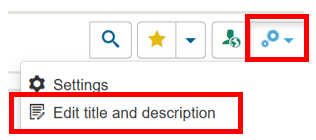
You can change the title and the description of a
course in the More settings menu on the right in the course view.
The semester and CC licence can also be changed there.
Data of a course can be archived by the learning resource owner. To do this, open your OLAT course and click on 'More views' (triangle icon) in the icon bar at the top. Then select Data archiving.
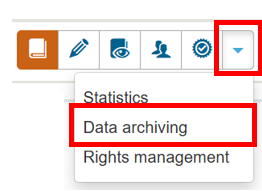
Now, in the data archiving tool, you will find various items in the
menu on the left you can archive.
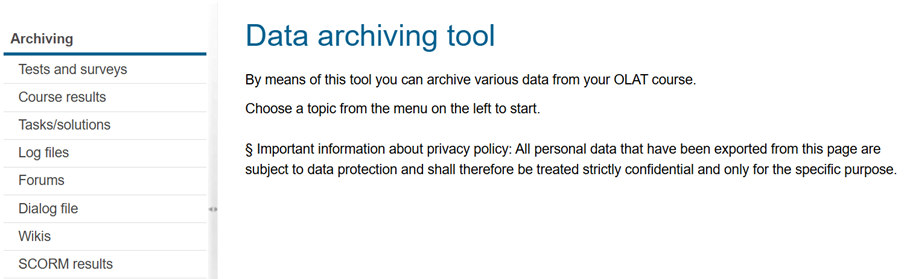
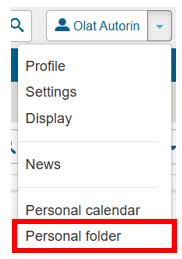
The archived data is then stored in the Personal folder.
As a course owner you can delete courses. If this happens while the course is still running, please make sure that the participants are forewarned in case they need to download important files.
Please open the course. You can find the delete option in the More settings on the right side.
Deleted learning resources will be moved to the recycling bin. In case you realize that you do need a learning resource that you deleted earlier, you can restore it from the recycling bin within 90 days after deletion.
You can access the recycle bin via Teach & Learn. The last
option in the left menu is the Recycle Bin.
Restore restores the course to
the state it was when you deleted it (complete with participants and their
entries).

Preparing courses for teaching
Every course element (in the editor view) has the two tabs Visibility and Access. These tabs can restrict access to the course element.
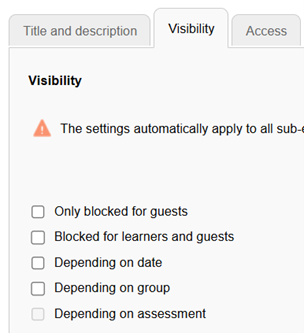
Restriction of Visibility: Those who do not meet the prerequisite for visibility will not see the course element.
Restriction of Access: Those who do not meet the prerequisite for access can not use the element (even though they might see it in the course).
Visibility is the prerequisite for access. If you have defined rules for visibility, you do not need to repeat them in the Access tab.
Example 1: A folder is meant to be only visible to people enrolled in the course (Visibility: Depending on group). If students are not members of that group, they will not see that the folder exists.
Example 2: An enrolment element is meant not to be accessible before a specific date and time (Access: Depending on date). Students who click on the enrolment before the specific date are informed that they are too early (and when enrolment will be possible). Still, they can see that the course will require an enrolment, because the element is visible.
It is essential for the use of copyrighted material that you make sure that only students enrolled in your course have access to copyrighted material. This is one of the reasons why every course needs a course group.
There is no definitive answer to which way you should choose to restrict access. For example, if you would like your course structure to unfold slowly over the course of the semester, using the Visibility tab would be your best option. If you want students to know that a certain element will be available depending on certain conditions, than Access is the way to go.
The learners' view allows course owners to go through their course from the learners' perspective.

This allows them to check whether the learning scenarios they have developed work as expected, such as restricting access to tests to members of a specific group or allowing content to be viewed only after a certain date.
The option Publish in the Course editor's Editor tools in the upper
right corner is one of the most important actions when creating a
course. Because of its name, it is often confused with the publication of the course in the OLAT course catalogue. However, both actions are completely independent from one another.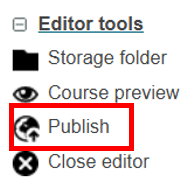
Publishing your course from within the Course editor will tell OLAT to regard the published version of the course as the one it is supposed to show to people accessing the course. This means that you have to publish changes you make to the course for them to become visible to people viewing the course. If you omit to publish changes (like a folder that you deleted or a course element that you renamed) your course participants will still see the old version.
Publishing is also one means to change the course access settings.
Course owners can officially close a course. By closing a course, you inform the course participants that this course is no longer edited and updated.
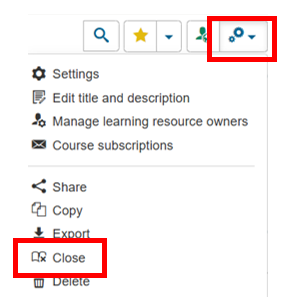
This has several consequences:
- The course gets the label closed.
- New members cannot enrol in this course, even though the enrolment element would otherwise permit this.
- New course elements cannot be added.
When you choose to close a course, you have several options:
- Delete all catalogue entries of the course (this happens anyway at the end of the semester)
- Remove all tutors and participants from the learning and right groups of the course. Attention, this means you can no longer access course participants' performances in tests, tasks, etc.
- Send an e-mail to tutors and/or participants indicating closure of the course.
Closing courses cannot be reversed. This specific
course will keep the closed label, and so will every copy of that
course. If you would like to reuse the course elements of a closed
course, start with a fresh course and import the elements via the
function From another course in the menu to the right in the course
editor.
Group management
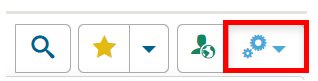
Access to the group management is via de group icon in the top menu:
![]()
More information can be found in the group management manual.
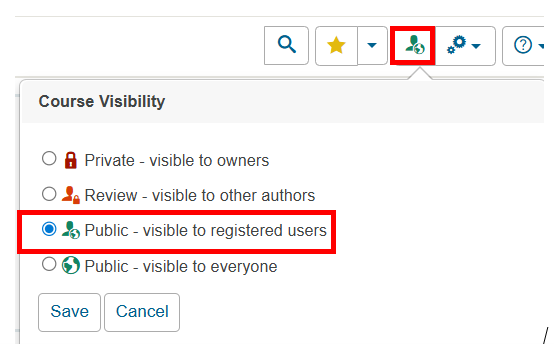
The course must be visible to students. Please chose Public - visible to registered users:
All relevant course elements must be published.
The first course element (course header) must be accessible (not blocked for learners or dependent on a course group they do not belong to).
If self-enrolment is desired, it must be enabled in the tabs Visibility or Access (not blocked for learners or dependent on a course group they do not belong to).
The Login page also permits guest access.
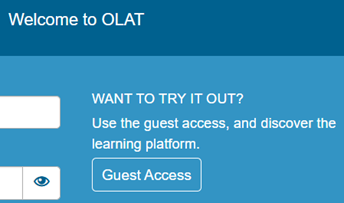
Guests cannot work in a course or read its content, unless the content is made accessable to guests by course authors. They cannot enrol or upload files and cannot post messages in discussions.
Guests are unknown co-readers. If guests are permitted in a course, no one knows who actually visits the course aside from the enrolled students. Guests are anonymous.
Therefore, it is of essential importance that you protect your course element and their contents by setting group dependency for Visibility OR Access. This will prevent guests from accessing them.
OLAT sends e-mails to the university e-mail address. It is simply a distribution, so there is no internal postbox where you copy the e-mail you sent.
There are (at least) two general methods to contact participants.
Via group management:
Open group management and check the box in front of the respective group and click the letter icon:
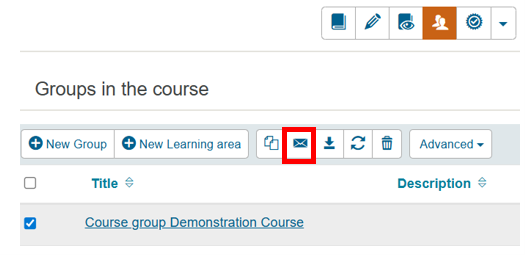
In the next step you can single out participants for your message.
Via the course element Messages:
When a participant
opens the messages course element he/she will automatically
subscribe to it. If you put your messages here, participants will automatically
receive them as e-mail. They will also be notified on their home page.
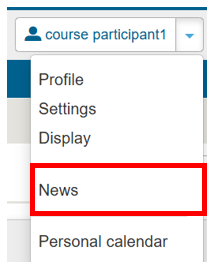
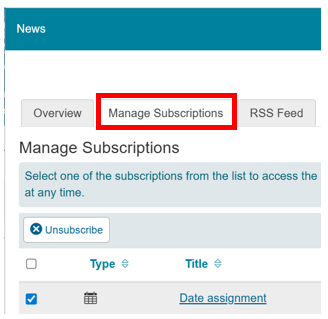
Subscriptions to course elements (for example messages) do not end with the group membership. To unsubscribe from these notifications, students have to access their option News and there their option Manage Subscriptions.
Course roles and rights
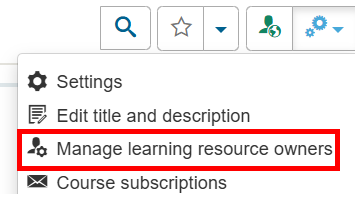
With Manage learning resource owners you can give co-ownership of the course or to other learning resources to other persons.
Prerequisite is that the recipients have authors' privileges in OLAT.
The settings for Course Visibility determine who will be able to see the course in the system (and find it in the catalogue or via the search option).
The necessary setting for a live course is Public - visible to registered users.
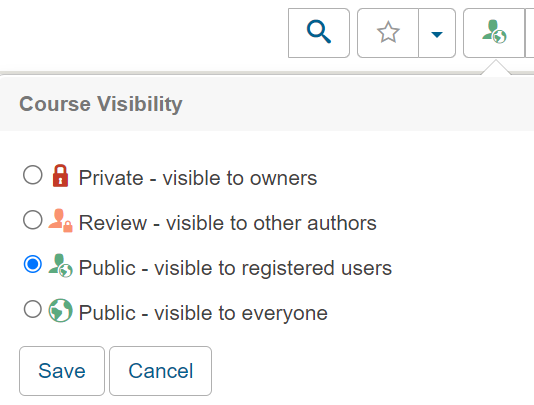
A course that is created with some of the templates will initially have the visibility set to Public - visible to registered users.
A course that is copied will initially have the visibility set to Private - visible to owners.
You can, of course, change it temporarily to owners only and then later back to registered users.
The courses are protected by the authentification during the login to OLAT. The HRZ account is a strong protection.
The second layer of protection is the fact that you limit the access to copyrighted material by making sure that only students enrolled in your course have access (see Visibility and Access, also Why do I need a course group?).
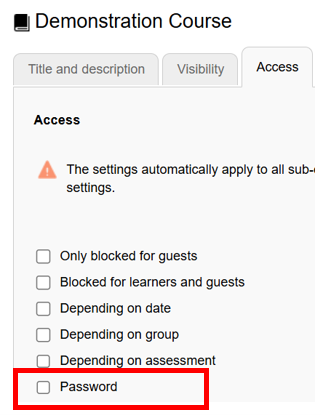
You can, in addition, set a password to a course or to section of a course. The option is in the tab Access of the first course element and in every course element of the type Structure.